This article demonstrates how to set up Apple (Mac) Mail on macOS (formerly OS X) to access an techseri e-mail account.
To configure Apple (Mac) Mail to work with your techseri e-mail account, follow these steps:
- Make sure you have already created at least one e-mail account for your domain. If you have not done this, please see this article to learn how to create an e-mail account using cPanel.
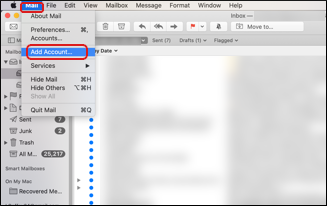
- Start Mail.
- On the menu, click :
 The user interface displayed in these images may differ slightly from the version you have installed.
 -
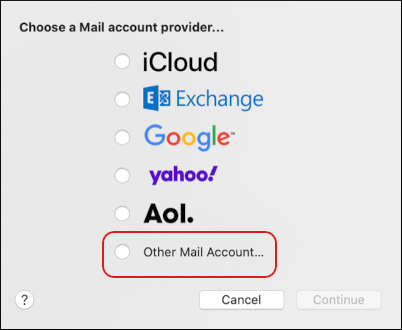
Under Choose a Mail account provider, click Other Mail Account:
-
Click . The Add a Mail account dialog box appears:
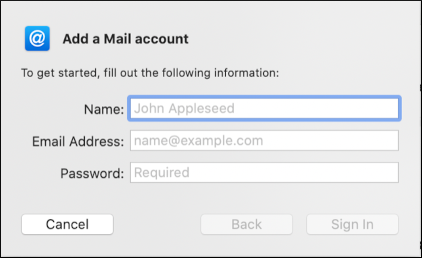
- In the Name text box, type the name that you want to appear on messages you send.
- In the Email Address text box, type the e-mail address of the account you created in cPanel.
- In the Password text box, type the password for the e-mail account you created in cPanel.
-
Click :
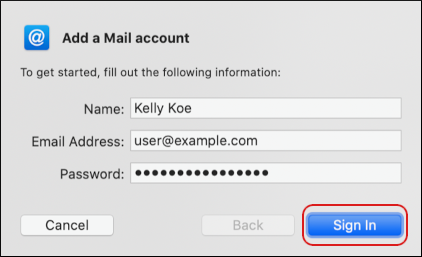
Mail tries to log in automatically, and may display the error message ”Unable to verify account name or password.” This is normal.
-
In the Account Type list box, select the type of incoming mail server that you want to use:
- If you want to use POP, select POP.
- If you want to use IMAP, select IMAP.

-
In the Incoming Mail Server text box, type the complete techseri server name for your account, such as mi3-ss31.techseri.com or az1-lr2.supercp.com. For information about how to determine your account's server name, please see this article.
If you plan on using secure SSL/TLS access with POP3 or IMAP (and we strongly recommend that you do), you must use the techseri server name instead of your own domain name. Otherwise, your client application may display security warnings that the shared SSL certificate for the server does not match your web site's domain name. -
In the Outgoing Mail Server text box, type the complete techseri server name for your account, such as mi3-ss31.techseri.com or az1-lr2.supercp.com. For information about how to determine your account's server name, please see this article.
If you plan on using secure SSL/TLS access with SMTP (and we strongly recommend that you do), you must use the techseri server name instead of your own domain name. Otherwise, your client application may display security warnings that the shared SSL certificate for the server does not match your web site's domain name. -
Click . Mail tries to log in to the server a second time:
- If the login is successful, and you selected POP as the account type, configuration is complete.
- If the login is successful, and you selected IMAP as the account type, follow these additional steps:
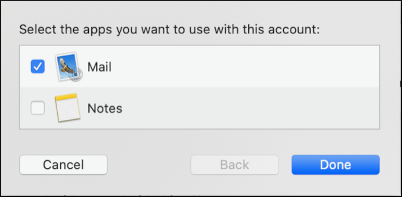
- Mail asks which apps you want to use with the account. Confirm that Mail is checked. Optionally, you can also select the Notes app if you want:
- Click . Mail adds the account and downloads any messages.
-
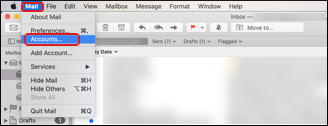
On the menu, click :
-
In the list of accounts, click the account you just added, and then click :

-
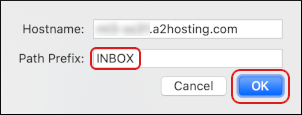
Confirm that the Path Prefix text box is set to INBOX, and then click :
Mail is now configured to work with your techseri e-mail account.
- Mail asks which apps you want to use with the account. Confirm that Mail is checked. Optionally, you can also select the Notes app if you want:
More Information
- For information about how to troubleshoot issues with Mail on macOS, please visit https://support.apple.com/en-us/HT204075.
- You can also get more Mail troubleshooting tips in this article.
